Configuring GPS Receiver
GPS functionality is available to Pro License users only.
To perform GPS surveys using TamoGraph, you need a source of Global Navigation Satellite System (GNSS) data. TamoGraph supports two types of such data sources:
- A GPS receiver. TamoGraph supports any GPS receiver as long as it is NMEA-compliant. This includes almost all Bluetooth and USB GPS receivers; such receivers communicate with the computer over a virtual COM port (also referred to as a “serial port”). Unlike GPS receivers, GPS navigators (which typically have displays) are usually not NMEA-compliant and therefore cannot be used with TamoGraph unless special software is used. You can use Garmin devices; however, you will have to use GPSGate Client, a commercial utility, to make your Garmin navigator NMEA-compliant.
- On Windows only: a Windows GNSS sensor. Such sensors are integrated into many new Windows laptops and tablets. Note that there are location sensors that do not use satellite navigation. TamoGraph supports only satellite-based (GPS or GLONASS) sensors; other types of location sensors are not supported.
Using GPS Configuration Dialog
If you use an integrated Windows GNSS sensor, you do not need to perform any additional configuration steps or driver installations. Simply click Settings => GPS Settings to verify that your sensor is working and providing data on your current coordinates.
If you use an external GPS receiver, connect it to your laptop and configure it as per the manual provided by the device manufacturer. For Bluetooth devices, this typically involves “Bluetooth pairing”; and for USB devices, a driver installation is usually needed. Once your device has been connected to your laptop and turned on, click Settings => GPS Settings.
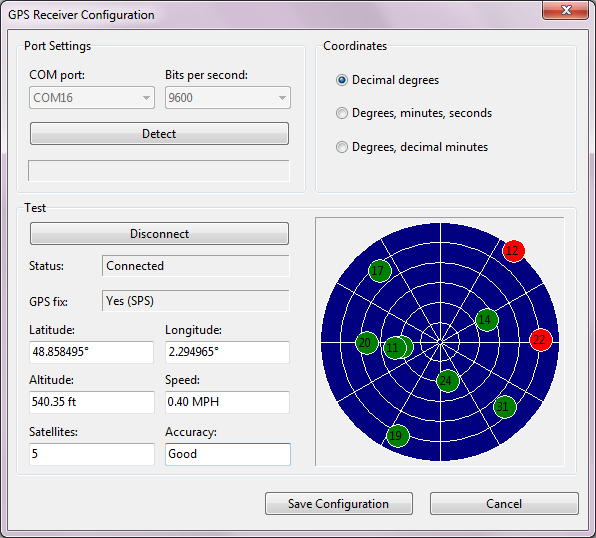
To configure TamoGraph to use your GPS receiver, all you need to know is the COM port number (on Windows) or Port name (on macOS) through which your device is connected to your computer and the Bits per second rate. The Port Settings frame allows you to select these values. Finding out the port number is discussed below in this chapter. The Bits per second rate is typically 4800 or 9600; please refer to the GPS receiver manual to find out this value. You can also click Detect to have TamoGraph scan your ports and detect the correct values. However, this might take several minutes.
Once you have selected or detected the port number/name and data rate values, click Connect to test your GPS receiver. The dialog will display the connection Status and the availability of GPS data (also referred to as a “GPS fix”). If GPS data is available, which typically requires that you be outdoors, you will see your current Coordinates (you can select the format you prefer in the corresponding frame), as well as the data accuracy information. Click Save Configuration to save the data. You are now ready to perform GPS-assisted site surveys.
The GPS settings dialog on Windows is illustrated below:
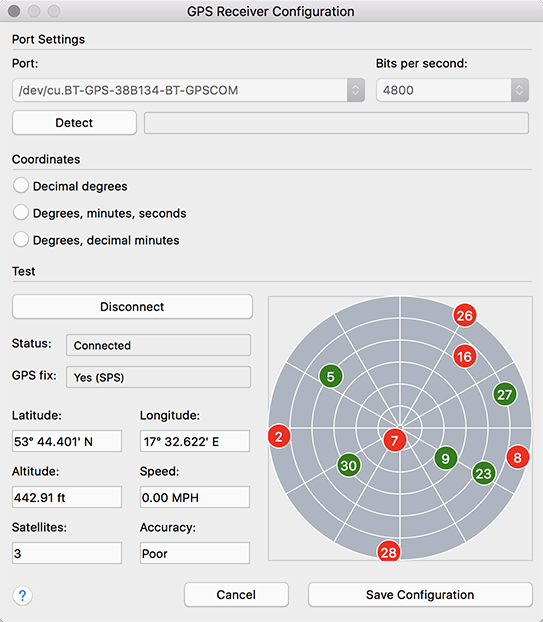
The GPS settings dialog on macOS is illustrated below:
Finding the GPS Receiver Port Number
As was explained earlier in the chapter, GPS receiver configuration requires that you enter the correct COM port number or name for your receiver. This information can be either automatically detected in the GPS configuration dialog or easily found by the user.
Windows |
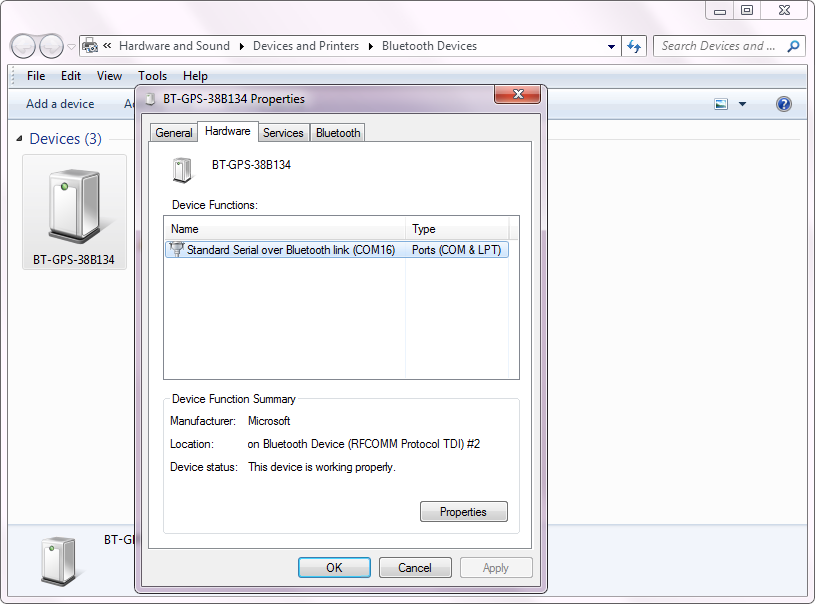
For Bluetooth devices, open Devices and Printers in Windows, find your Bluetooth device, and double-click on it. The Hardware tab will display the port number, as shown below.
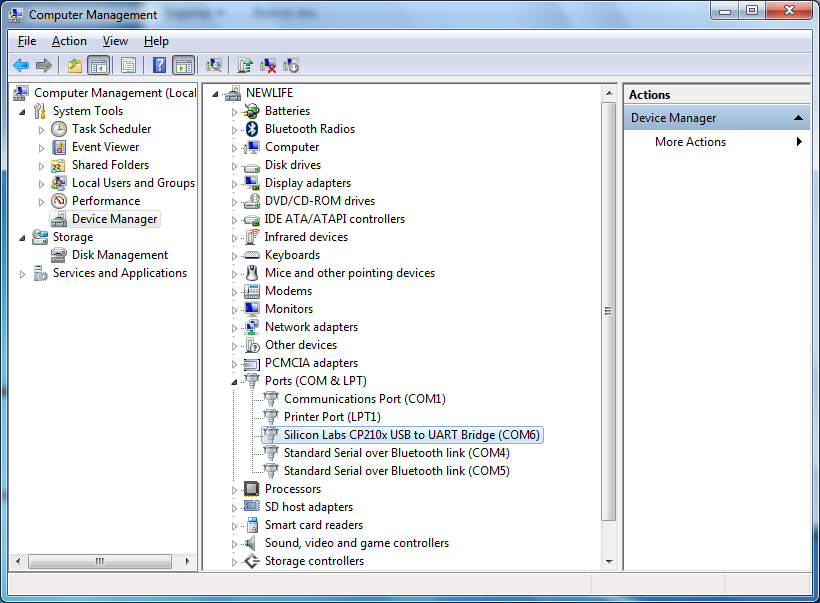
For USB devices, open Device Manager and find your device under Ports (COM & LPT). The device name will be followed by the port number, as shown below.
macOS |
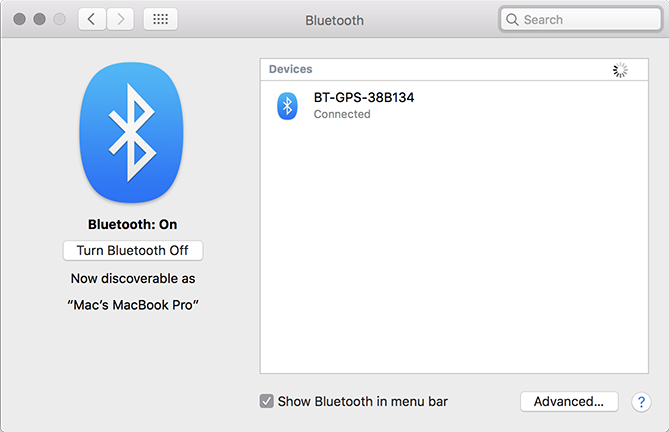
For Bluetooth devices, the port name typically contains the name of the GPS receiver that you have connected. An example of the port name would be “/dev/cu.BT-GPS-38B134-BT-GPSCOM” for the GPS receiver illustrated below:
For USB devices, the port name typically looks like “usbserial-xxxx”.