|
To perform a
throughput test, the application uses two components: a server and
a client. The server part
of the application listens for connections from the client, and
the client connects
to the server. Once the connection has been established, the client
and server send data in both directions, and the client part of the
application computes and displays the network metrics.
Installation
When
you install the application, both the server and client components
are installed. You can then run either one, depending on how you
plan to perform the tests. In a WLAN, the server part should be run
on the wired side of the network, while the client part should be
run on a WLAN client. In this type of a setup, "downstream" would
be the data flow from the wired side of the network through the
access point to the client, and "upstream" would be the data flow
from the client through the access point to the wired side.
While this
application is intended primarily for testing Wi-Fi network
throughput, you can also use it to test wired networks. If you test
wired LANs, it's not important which of the two computers acts as a
server and which one acts as a client.
Configuring the Server
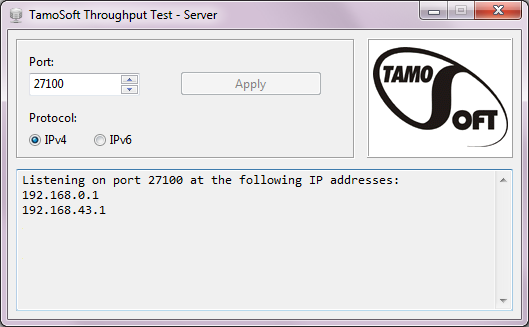
The
server part of the application has only two configurable options:
the port on which it listens for incoming connections and the
network protocol to be used (IP, also known as IPv4, or IPv6). By
default, the server listens on port 27100 and uses IPv4, as shown
below:

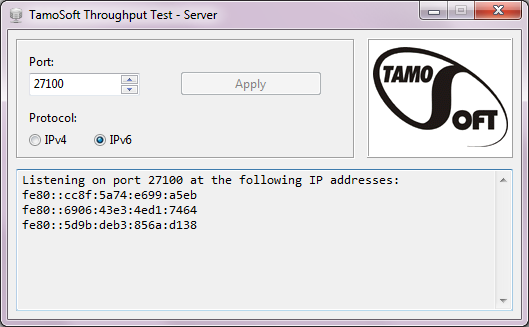
If you want to
change the port number or the protocol type, simply make the
corresponding changes and click Apply:

The
picture above illustrates the use of the IPv6 protocol. The log
window displays the IPv4 or IPv6 addresses used for listening by
the application.
Note that the
server part is available for Windows and Mac OS only. It is not
available for Android. You can use the Android client with a server
running on Windows or Mac OS.
Configuring the Client
In the client
component, you only need to specify the port number to be used for
connecting to the server (if you changed the default port number
27100 on the server side).
|

